Warehouses management
Warehouse management
- Building
- Shop
- Supplier
- Defective products
- Products reserved (for instance for a showroom, or internal usage)
Warehouses Settings

From there, you get the possibility to create/change any warehouse.

 Note: Be careful to never delete your default warehouse, as it can lead to several problems in Connect.
Add a new warehouse
General
- Main
- Advanced Options
- Address
- Product settings
- Purchasing setting
Fields | Description |
Warehouse name | Specify the warehouse name |
Warehouse Type | Specify the warehouse type as shipping, Dropship, Pickup or None. Refer below for further details. |
Status | Warehouse status. Disabled warehouse(s)will not be displayed into MyFullfillment grids. |
| Primary warehouse | Set "No" for all warehouses |
Notes | You can specify the small notes. |
- Warehouse of the type "Shipping" will be available from Order-preparation screen.
- Warehouse of the type "Dropship" will be available from Dropship screen.
- Warehouse of the type "Shipping" OR "pickup" will be available from the Bulk editor screen.
Fields | Description |
Disable stock movements | Disable complete stock movements. Be careful when using this option. |
Warehouse for quantities to be received | If enabled, this warehouse will become a virtual warehouse, that only contains quantity expected from purchase orders. Use this option carefully |
Reset products location | If enabled, location will be reset for products once they are out of stock |
Enable WAC calculation |
Warehouse Address
| Fields | Description |
Use for sales statistics | If enabled, sales statistics will be calculated for this warehouse. |
Default warning stock level | Default warning stock level for all products associated to this warehouse. |
Default ideal stock level | Default ideal stock level for all products associated to this warehouse |
Enable automatic update | Enable the automatic calculation & update of warning and ideal stock levels |
Optimal stock level duration | Sales period to be covered without out of stock. In days, the default value is 15. Used in warning & ideal stock levels automatic update |
Warning stock% | Warning stock level automatically set to X% of the ideal stock level. Default value is 30% Used in warning & ideal stock levels automatic update |
Ignore statistics lower than 1 | If enabled, warning & ideal stock levels will be set to 0 when calculation is below 1 Used in warning & ideal stock levels automatic update |
| Enable kit products stock calculation | Enable stock level calculation for kit products (based on children products stock levels) |
Fields | Description |
Use for supply needs | If enabled, supply needs will be calculated for this warehouse |
Defective products warehouse | When a purchase order is received in this warehouse, all defective products will be sent to the warehouse selected |
Figures
Fields | Description |
In stock products | Number of « simple » products having physical stock in this warehouse |
Total quantity | Total physical quantity of « simple » products |
Total value | Overall value of products in this warehouse. The overall value is calculated as follows for each product : « {physical_qty} x {product_cost} » where {product_cost} is selected in the following order : 1) Product WAC 2) Primary supplier buying price 3) Product cost attribute |
Products
The overall details of the products associated to the warehouse will be listed in the table.
The product details that are shown on the grid are as follows:
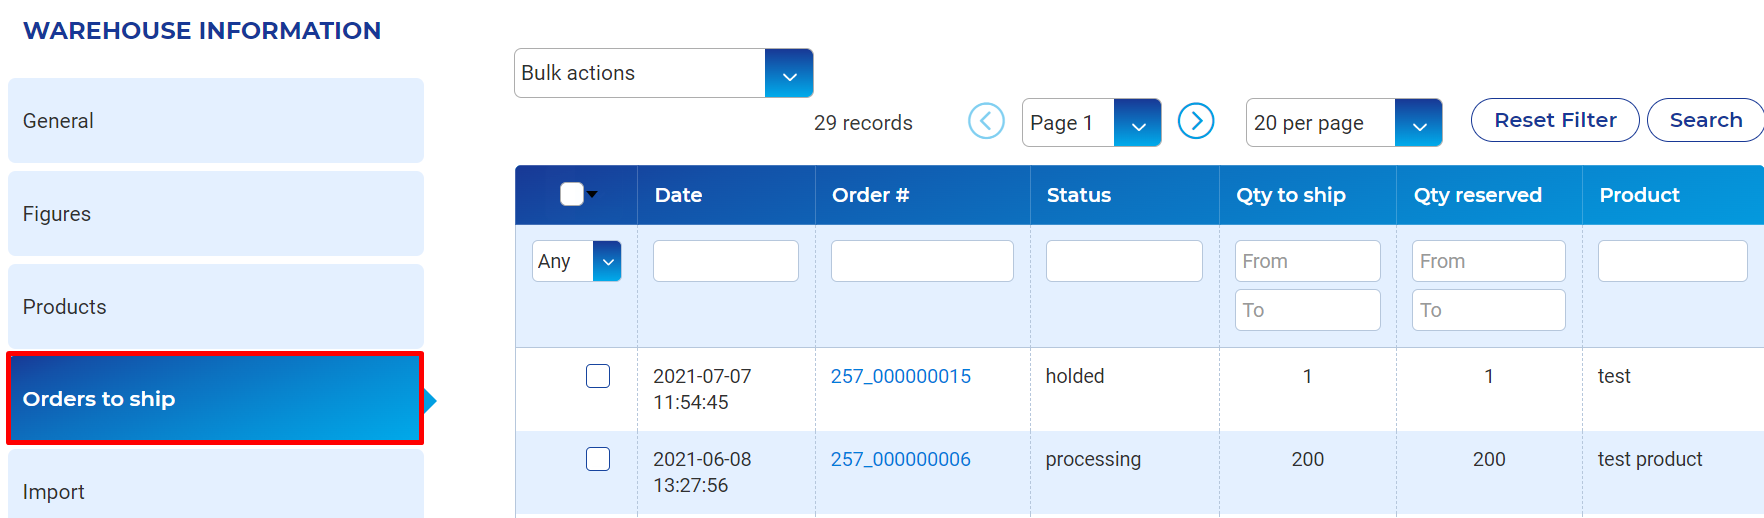
SKU, Product name, Quantity in warehouse(physical stock), Quantity available, Quantitty to ship, shelf location, WAC, Supplier price, Total value(calculated with the quantity of products in warehouse and the price).Orders to ship:
Import

Stock history
Use of Stock history is to have a track of everyday product count and the valuation amount in your specific warehouse.
Download of the CSV file with the overall stock with the specific products are listed.
Delete a Warehouse
Modify a Warehouse
Unlock your online store's potential
Whatever your e-commerce business, discover how to streamline your operations and boost your business growth with Boostmyshop.